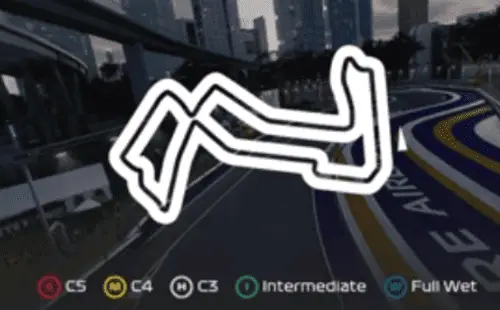
The Marina Bay Circuit in Singapore has been on the calendar since 2008, but was reprofiled into a slightly faster layout in 2023, which returns in 2024. I personally prefer this layout as it gets rid of some fiddly sections that didn’t really add much value before, and shaves about 6-8 seconds off lap times so you can peel off the laps a lot quicker.

For a race setup here, it’s no surprise that you need maximum downforce or close to it because of all the cornering and few straights here.
And for me, just using a modded version of my generic starter setup seemed to work great in career mode, qualifying a midfield Kick Sauber on pole in my first career season on 95 AI, which isn’t bad. But I’m personally moving down just a tad from maximum downforce to give more protection on the DRS straights, since track position is so critical here.
Here’s a general dry race setup for Singapore for a controller user:
- Wings – 46/48
- Diff – 10/45/50
- Camber/Toe – -2.50/-2.20/0.00/0.25 (LLL25)
- Suspension – 39-5-15-9-25-58
- Brakes – 100% Pressure/53% Bias
- Tyre Pressures – Fronts 26.0; Rears 24.0
Hotlap Using This Setup
More Setup Analysis & Tips
Here’s some extra analysis and possible tweaks for making your own preferred setup.
Wing levels – You can probably get slightly better single lap pace using 48/50 wings if you pound away for long enough, but I drop the wing levels 2 clicks to 46/48 just to give that bit extra straight line speed. You really need that in races against the AI on this game with how powerful the ERS/DRS/slipstream are together. But experiment to see what works for you, and you can bring the wings closer together to 49/40 or 50/50 for stronger turn in for qualifying.
Tyre Pressures – Overheating tyres was a major issue at Singapore on previous games, but it’s not so bad on F1 24. Therefore you can leave your pressures anywhere from right in the middle, to maximum, depending on handling preference (lowering them provides better traction and low speed grip, which I prefer). Simple option – stick all pressures in the middle (works fine). More complex option – set the right hand side tyres higher. The right hand side tyres do overheat slightly more than the left hand side, so you can raise the the front and rear right pressures 0-5-1 PSI versus the left hand side tyres if you want, but it doesn’t really seem to make much difference on this game.
Intermediate Conditions – If it’s raining lightly, you’re almost at max wing levels anyway, but I’d ALWAYS space the rear wing 3 clicks above the front in the wet here, so use 46/49 or 47/50, for better stability. Other than that the dry setup should work OK< but you can soften the suspension and ARB 1-2 clicks, and raise the ride height 1-2 clicks as well. Also use min On Throttle Diff of 10 if you’re not already.
Full Wet Races – Full heavy rain conditions, again use the 3 click spacing with the wings to avoid over-rotation on a pad, so 47/40 wings is recommended. Then you need usually make some more pronounced changes to the suspension settings.
For a full wet race, here’s a suggested race setup for Singapore for a pad user:
- Wings – 47/50
- Diff – 10/50/50
- Camber – -3.50/-2.20/0.00/0.13
- Suspension – 37-3-13-7-28-61
- Brakes – 95% Pressure/53 Bias
- Tyre pressures – Middle pressures all tyres.
Bonus Setups Resources
The wing levels are more or less set in stone round Singapore, but there are also other ways you can go with other aspects of the setup, for better single lap pace or customized for certain cars.
Here’s some extra setup resources you can check out in this regard:
- The SimRacingSetup channel’s Singapore race setup can also be made to work pretty well on a pad, with some minor adjustments – 46/48 wings, 10/45/50 Diff settings. It was a similar speed and potentially a little faster in races with my testing, but also more unstable and tricky to control as the tyres started to wear. I prefer my own modded template setup, but test this one against it if you like to see what you prefer.
- F1laps.com Singapore page – Another car setup forum with pages for every track, and loads of custom setups posted, both TT and race, all cars, all conditions.
- F1gamesetup.com – An even more specialized resource with custom setups, every car and every track, wet and dry weather.
- Sim Racing Centre (Paid) – Premium setup packs either for single tracks or the entire game, but they’re more advanced eSports style setups that may suited wheel users more than pad users. Therefore may be overly aggressive and/or need some serious tweaking to work on controller.
Driving & Strategy Tips For Singapore
Here’s some extra tips for driving round this now much more flowing track
ERS (Qualifying) – Got plenty of the fastest Overtake ERS mode to use on qualifying laps round here – about 10-12 seconds or so in online races. So you can use a couple of blast of a few seconds each on any of the straights to boost acceleration and top speed. I like to use most of it on the first main DRS zone out of turn 5, and the on the other new straight towards the end of the lap with removing of the grandstand section. Just keep an eye on the yellow ERS bar and aim to drain it just as you cross the finish line.
Undercut – Track position is crucial here as overtaking is so difficult, so with the more durable tyres this year, you can definitely come in 1-2 laps early and try and jump a bunch of cars in front. The undercut is powerful as tyre deg is quite high, so the pace benefit of fresh tyres is very noticeable and you can jump several places at the pit stop if you come in early.
Defending/Attacking (races) – On the ’23 game, ERS ran out in no time, but on this game, it does recoup faster in races to the point where defending position is possible as long as you’ve got your rear wing set at 48 or lower and deploy it strategically only in certain places. If you deploy several second bursts at two main places – going onto the main DRS straight out of turn 5, and then going onto the last DRS straight out of turn 13 – and then just let it recharge the rest of the lap, you should be able to hold position against the AI and repeat this lap after lap. Just make sure you get good exits onto these main DRS straights.
