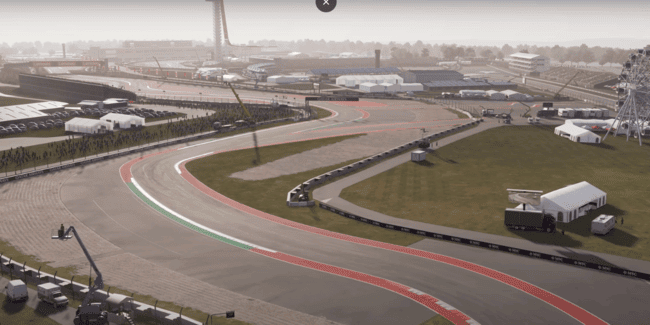
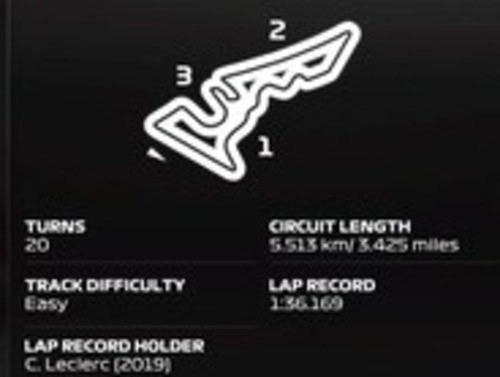
The Circuit of the Americas (CoTA) in Austin, Texas could be considered a mature and well established fixture on the F1 calendar now, having been on it since 2012. It’s got a mixed reputation among fans but it’s mixed track that offers a it of everything and is a challenge to get right lap after lap, especially regarding corner cutting.
More and more as I get to these later tracks on the calendar, I’m defaulting to using my template setup I usually start with, and just modding the wing levels and a few other settings. I think it’s better on this game to get used to the handling of one setup and keep tweaking it rather than having drastically different setups for each track.
And it’s the same of Texas – my generic starter setup just modded to give higher levels of downforce, as this is typically what you need at CoTA
Here’s a general dry race setup for Texas for a pad user:
- Wings – 32/34
- Diff – 10/50/50
- Camber/Toe – -2.50/-2.20/0.00/0.13 (LLL13)
- Suspension – 39-5-15-9-25-58
- Brakes – 100% Pressure/53% Bias
- Tyres – Maximum pressures all tyres
Race tyre strategy – Medium – hard.
Hotlap Using This Setup
Additional Setup Info & Tips
Here’s some more tips and considerations for creating your own setup.
Wing levels – I actually used 34/36 wings in my first career mode race round here, but even that was too high and I was still getting driven past on the main back straight. Therefore I wouldn’t even recommend those wings, but would go down to 32/34 wings (I’m trying that next season). That’s what you need on F1 24 with how powerful the ERS/DRS/slipstream is. You need to use lower wing levels than you might think to defend against the AI on the straights.
Tyre Temps/Pressures – Because of all the traction zones and successive corners here, the tyres are put under a lot of stress and do overheat quickly. It’s less of a problem overall on F1 24, but this track is still one specific one you need to watch out for overheating. Therefore it’s max pressures all 4 tyres to keep the temps down, and even then the rears will still overheat if you use the softs for any more than 1 lap (more on this below).
More Aggressive – If you want a setup that’s more aggressive, you can bring the wings closer together, lower the Off throttle Diff, or raise the suspension and roll bar values, but this makes the traction a lot trickier, especially in sector 1 and especially with worn tyres. I prefer setups that are stable across an entire long run, though they are more conservative and potentially slower than some other setups.
Intermediate Conditions – For lighter rain conditions, you can bump the wings up a little bit, but I’d always set the rear wing 3 clicks above the front in any wet conditions to give you a bit more stability, as traction is tricky enough on this track even in the dry. You can also soften the suspension and raise the ride height 1-2 clicks, but otherwise your dry setup can be a good starting point.
Full Wet Races – Full full wet conditions, you need some bigger tweaks, upping the wings and softening the suspension and ARB, and raising the ride height by several clicks.
Here’s a suggested full wet race setup for Texas for a pad user:
- Wings – 37/40
- Diff – 10/55/50
- Camber – -3.50/-2.20/0.00/0.13
- Suspension – 37-4-13-7-28-61
- Brakes – 95% Pressure/53 Bias
- Tyre pressures – Max pressures all tyres.
Mastering CoTA (Very Detailed Track Guide From E-Sports Driver)
Bonus Setup Resources
Because of the twisty sections here, you’ve got some setups using really aggressive wing levels and generally optimizing more for single lap pace. Here’s some suggestions to check out if that’s what you’re looking for.
- If you want something more aggressive, you could try the SimRacingSetup channel’s CoTA setup, but with my wing levels (34/36) and Diff settings (10/50/50) ported over. I found this setup potentially fast over one lap, but the rear end was a bit instable and I wouldn’t want to be driving this setup on worn tyres in a longer race. His setups can be very effective but they’re designed for wheel users and therefore will need significant tweaking for controller users.
- F1laps.com Texas CoTA page – Another car setup forum with pages for every track, and loads of custom setups posted, both TT and race, all cars, all conditions.
- F1gamesetup.com – An even more specialized resource with custom setups, every car and every track, wet and dry weather.
- Sim Racing Centre (Premium) – Online shop that sells more advanced and aggressive setups, either for single tracks or all tracks in one pack (very expensive). More geared towards wheel users, but setups can be tweaked for pad users.
Tips For Racing At CoTA
The Austin race is a strange one on this game, with a lot of different factors such as tyre temps and the Sprint format combining together to make it quite challenging. Here’s some extra tips for navigating this weekend.
Sprint Format Weekend – Austin is the fourth of six Sprint race format weekends on this year’s official calendar (closely followed by Brazil and Qatar). Therefore you’ve only got one practice session to get the practice programmes done and a setup dialled in before everything is locked into “parc ferme” and you can’t change anything. Therefore be sure to change any engine parts straight away after P1, and also choose the Harder Tyre Allocation before the weekend starts if you want to free up more soft tyres to use for the single practice session.
Sprint & Race Qualifying – Depending on the tyre allocation you choose, you might only be left with one set of soft tyres to use for this session. If so, wait until the last 5 minutes before going out, as this is when the track is “rubbered in” and at it’s fastest. Same for main Quali if you’ve onyl got 1 or 2 fresh softs to use. Track evolution has been a real thing on recent F1 games, and times do get faster at the end of Qualifying sessions.
ERS (Qualifying) – You’ve got a decent allocation to use here – enough to use the fastest Overtake mode all along the pit straight and the back DRS straight to boost top speed. Keep an eye on the yellow ERS meter on flying laps and look to drain it up just as you cross the finish line.
Tyre Strategy – The red soft tyre is not usable in races here; even with maximum pressures, the rears overheat after just 1-2 laps. Therefore it’s a medium-hard or hard-medium strategy for longer races. It’s recommended to save all your softs for qualifying and don’t bother using them in races. I couldn’t even get through a 5 lap sprint race on the softs – the back end was all over the place with the overheating. For a 25% race, you could use the softs just for 1-2 laps and then go straight onto the hards, but this may not be optimal.
Traction – Lap time here on a pad seems to be about getting smooth traction out of corners, without the back end stepping out. I’ve tried to create a setup with easier to apply traction throughout a race. Additionally, try to be smooth, progressive and patient on the throttle as getting too greedy on the accelerator seems to exacerbate the overheating issues and make the traction harder, and it can become a kind of vicious cycle.
Defending – If it’s clear you’re in defence mode and are just trying to hold position against chasing cars, the ERS does recoup fast enough that you can use a simple strategy. Just use your Overtake in the two main DRS zones – the pit straight and the long back straight – and don’t use it the rest of the lap to let it recharge. Get good exits out the last corner and turn 11 and use your ERS strategically and you can defend, although even 34/36 wings was too high for me so I’ll be trying 32/24 next time.