
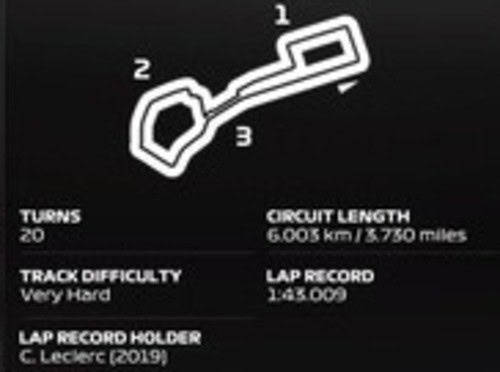
The Baku City Circuit in Azerbaijan is probably one of my most disliked tracks, as well as one of my weaker ones. I just find the layout annoying and uninspiring to drive. Once I’ve done this race once on any F1 game, it’s usually left off any subsequent seasons I do.
Regarding setup, it’s customary to run low downforce setups here, simply because of the massive mile long pit straight. Everything in the setup is pretty much needs to be geared towards that when racing against AI, even if it costs you round the rest of the lap. You’re not quite going as low as Monza/Vegas for wings, but still pretty low (similar to Miami).
Here’s a general dry race setup for Baku for a pad user:
- Wings – 7/10 or 17/20
- Diff – 10/55
- Camber/Toe – -3.50/-2.00/0.05/0.15
- Suspension – 41-3-14-10-22-49
- Brakes – 100% Pressure/55% Bias
- Tyre Pressures – Fronts 27.0; Rears maximum
This setup is primarily designed to give the car a nice stable and planted feel, for easier traction over the course of a race, not just single lap pace, although it will cost you some extra tyre wear and potential outright pace.
The turn-in may feel more moderated and sluggish, but this is on purpose to help navigate the more tricky sections (like the “castle” section) more consistently lap after lap, without turning in too sharply and clipping the wall. If you want a more “loose” and sharper feel to the handling, I’ve got some suggested tweaks further below. My setup is a more cautious one focused on consistency and surviving without crashing.
Hotlap With My Setup
Additional Setup Analysis & Tips
Here’s some extra info on creating your own setup or using this one.
Wing levels – The customary approach round here has been to run super low wing levels here to compete on the straight. Anything higher than 11 or 12 for the rear wing and I think you’ll struggle against the over-powered AI especially. And you can go even lower to try something like 7/10 wings or 6/9 if you can still maintain decent overall lap times. Also, regarding the wing spacing, even my normal 2 click gap is not enough to maintain smooth traction over a stint so I’ve gone for 3 click spacing instead after some testing.
However, you can also go the higher downforce route on F1 25, adding 10 clicks to run something like 17/20 wings. This will make you better in the twisty middle sector but weaker on the two long DRS straights. It’s up to you depending on what you want, but there is definitely more of a tradeoff in the handling on ’25 where higher wings gives better launch off corners as well as better grip and traction over long stints and easier following of cars with less dirty air.
Traction & Rotation – This setup has been all about dampening the rotation so the car doesn’t oversteer in corners and you can get back on the throttle smoothly out of all the corners smoothly without the back end stepping out (costs you time if you keep doing this with all the traction zones). The main 2 settings I’ve adjusted for this besides the wings are increasing Off Throttle Diff to 55, and also adding some front and rear toe to create a more planted and softer handling. I’ve also used 14/10 roll bars for a more sluggish but planted feel.
More Aggressive – If you want to make the setup more aggressive for better cornering in the twisty infield bits, you can: a) bring the wings closer together or invert them, b) Lower your Off Throttle Diff for better rotation, c) Flip the ARB values around to something like 12/16 or 12/21, or d) Move all the geometry settings back to LLLL. But it’ll make it much harder to control on traction once the tyres start to wear. My setup is designed to be stable and easier to control in offline races. It’s not blisteringly fast, BUT it is easy to be consistent and avoid crashing especially. So it depends whether you want raw pace or easy handling, but if you want to be quicker, you’ll have to invert the wings and set the front wing higher than the rear and be more aggressive on turn in.
Qualifying Tweaks – I’ll admit this setup is much weaker in qualifying as it’s designed for stability in the race. If you’re wanting some simple setup tweaks to unlock more single lap pace in Quali and that you can reverse for the race, raise the front wing a few clicks to be closer to or above the rear wing, and also drop your Off Throttle Diff to 45 or 40 for sharper rotation. You can move these settings back for the race as well as they’re not restricted by parc ferme rules.
Tyre Pressures – Baku has always been a traction heavy and rear limited circuit, so the rear pressures have always needed to be at maximum here. For the front tyres though, I was struggling to get the hards up to temperature, so I’ve dropped the PSI down a bit there.
Intermediate Conditions – When it’s just raining lightly, you need even more stability built into the setup. I’d keep the wing levels similar to the dry setup, but space the wings 4 clicks apart (so something like 10/14 or 12/16), and raise the Off Throttle Diff to 60 or 65. This is to dial out the rotation and make traction easier out the slow corners (very hard in the wet).
Full Wet Conditions – For full wet conditions in a race, I’m guessing Baku won’t be fun at all. I’d add a bunch more wing to the setup, and space the wings 5 clicks apart for even more stability (so something like 17/22 or 18/23). Raise off Throttle Diff to 60 or 65, and also raise the ride height 3-5 clicks. Then it’s a matter of super careful and nuanced inputs on throttle and steering and being patient on the throttle at least until you reach 5th gear. Also consider turning ERS down to None in all heavy traction zones to make corner exits easier.
Tips For Racing At Baku
Here’s some extra driving and racing tips round here.
ERS (Qualifying) – This is a rare circuit on F1 25 where you actually have to be a bit more cautious with Overtake mode on Quali laps. The problem is, even driving down that massive mile long pit straight just in Medium ERS mode and not even using Overtake still drains your battery massively. Therefore don’t use Overtake much going onto your flying lap, and save your biggest chunk for the other DRS zone after turn 2 and coming back to finish the lap. My recommendation is to aim to exit turn 16 for the massive long full throttle section with about 40% of battery remaining.
Tyre Wear and Strategy – Here are the wear rates I found from my testing:
- Soft – 8% per lap
- Medium – 4.5% per lap
- Hard – 3.25% per lap
- Right rear tyre wears the quickest, followed closely by the left rear. Having a lot of wheelspin moments on traction out of corners increases both the rear wear and temperatures, so patience on the throttle is key during longer stints.
The main thing I’d say from my first race is that even using my more cautious setup, traction started getting tricky on both the soft and medium tyres after a few laps. Therefore, I’d recommend using the hard tyre for as long as possible in both 25% and 50% races. For 50% races, a medium-hard 1 stop is theoretically possible if you’re smooth and probably preferable as the time lost for an extra stop is quite a lot here, but traction seems awful tricky round here even several laps into a stint so it’d be a real challenge on a pad.
ERS (Defending in races) – The ERS recoups much more slowly on ’25 than it did on ’24, so you’ve to be much more sparing with it. Just very short bursts as needed along the two main DRS zones and sometimes defending won’t be possible against much faster cars. If you start using it in multiple other places around the lap, it’ll drop to 30% or below really quickly and from there is hard to replenish. This is another track where having a seriously upgraded Energy Recovery System in your career mode will really make you more competitive in races.
Turn 2 (First Lap) – There’s always carnage on lap 1 coming into this second left hander onto the first DRS zone, even with the AI cars and certainly in online races. The cars always seem to bunch up and will leave you with nowhere to go unless you’re very cautious and just approach this corner on lap 1 solely with the intention of surviving it with your front wing intact (having to pit on lap 1 and dropping out the DRS train costs you a ton of lap time). Aggressively trying to make up places here never seems to work; just aim to keep your nose clean and make any overtakes on the following straight using your ERS (very possible if you set your wings low enough).