
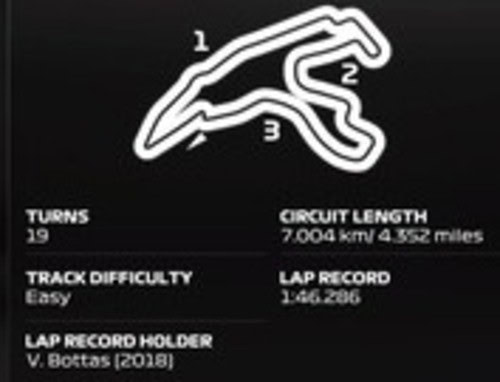
The Spa Francorchamps track is a classic on the F1 calendar, but honestly it’s kind of worn out for me with me driving it so much over 15+ years of sim racing. The layout is well known, with largely full throttle first and third sectors and a twisty second sector, and a very long lap overall.
Is is becoming customary on F1 25, you’re needing to prioritize straight line speed when battling against the over-powered AI, so you need super low downforce setup that maximizes your speed in sectors 1 and 3, even if it costs you a bit in sector 2.
Here’s a general dry race setup for Belgium for a controller user:
- Wings – 0/2
- Diff – 10/55
- Camber/Toe – -3.50/-2.00/0.00/0.15 (LLL/0.15)
- Suspension – 41-3-14-10-22-49
- Brakes – 100% Pressure/55% Bias
- Tyre Pressures – Maximum all tyres
Hotlap With My Setup
Additional Setup Tips & Analysis
Wing levels – The wing levels might seem a bit ridiculous, but you do need as much straight line speed as you can get on this game against the AI. Some players are also using something like 0/0 or even 2/0 or 3/0 for stronger turn in. I did also try 5/7 wings, and it did make sector 2 easier and also gained me a bunch of time at the last chicane, but overall lap times were about the same so I’m keeping 0/2 for best straight line speed. You can always try higher wings for the Sprint sessions, and move them lower just before Main Quali if you decide it’s costing you too much on the straights.
Geometry – As I’ve been doing on quite a few tracks on this game, I’ve added 5 clicks of rear toe as it gives a nice planted and stable feeling to the rear end, which helps in some of the corners including the final chicane especially. For maximum performance potential (but less stability), most players are using LLLL. But over race stints especially, I want the extra stability.
Roll Bar Settings – The 14/10 roll bar settings is used to give a nice stable planted feel for the final chicane, turn 1 and going up Eau Rouge, which are fine on fresh tyres but get trickier as the tyres wear. If you want something more aggressive, try flipping the roll bars round to something like 12/16 or 12/21, but it will make traction trickier as the tyres wear.
Intermediate Conditions – When it’s just raining lightly, your dry setup can work OK with some adjustments. but I’d always space the rear wing 4 clicks above the front in any wet conditions round here, and optionally add a few clicks of wing as well. So I’d use something like 0/4 to 2/6 round here. You can also set your On Throttle Diff to minimum if it’s not already there, for easier traction, and raise the Off Throttle Diff to 60 to dampen rotation and make traction easier.
Full Wet Conditions – For heavy rain conditions, it’s proving hard on this game with the traction especially. Add a bunch of wing and I’d space the rear wing 5 clicks above the front to make corner exits easy. So something like 7/12 to 10/15 wings as a starting point. Use minimum On Throttle Diff and 60 or 65 Off Throttle Diff, and also raise the ride height 3-5 clicks front and rear. And be super cautious and progressive on throttle and steering inputs.
Update – also consider turning down the AI level 10-15 clicks for any wet sessions, as it seems the AI are over-powered in the wet and proving basically impossible to compete against at an AI level that might have been fine in the dry. Patch may be coming to fix this
Additional Racing & Strategy Tips
Spa has always been about engine power and top speed, and it’s the same trend on F1 25 with the powerful potency of the ERS/DRS/slipstream combo. Here’s some extra tips for racing here.
Sprint Weekend Format
After China and Miami, Belgium is the third sprint race format weekend on the 2025 calendar, meaning it’s a different weekend structure with not much time for practice and setup prep at all – Practice 1 —- Sprint Quali—– Sprint Race —- Main Qualifying — Main Race.
Therefore, you’ve only got one practice session before setups are locked and you’re into qualifying, and with long laps it’s sometimes a struggle to get all the practice programmes done and passed. For the tyre selection before the weekend starts, The Balanced tyre allocation will give you one hard and one soft set for the sole practice session, which is what I prefer.
Setups are locked after the sole practice session, and only unlocked again briefly before you drive out in Main Qualifying. Therefore if you decide you’ve gone too high/low on the wings for your preference, or made another setup mistake, you can amend it and try something different just before you drive out for Main Quali (the fourth session).
Also, for the Sprint Qualifying session, depending on the tyre allocation and weekend format you choose, you might only have one set of soft tyres to use. If this is the case, it’s best not go out until the last 5 minutes to use your sole set, when the track is fully “rubbered in” and at it’s fastest. Track evolution is a real thing in the modern F1 games and going out late can gain you several tenths of second on your flying laps vs the start of the session.
Tyre Wear/Strategy
Wear is high at this track; here’s what I found:
- Soft – 8-10% per lap
- Medium – 7.5 – 8% per lap
- Hard – 5 – 5.5% per lap
- Front right tyre wears the most.
If you can keep the wear rates for the M and H down to what I’ve wrote above, then a 1 stop MH strategy is just about possible in a 50% race, pitting on lap 8-10, but the end of stints can be very tricky. Any more wear than that and you’ll need to do a 2 stop, and I’d select the Harder tyre allocation before the weekend starts so you can use MHH and not have to worry about tyre wear.
Engines
Like Monza, this is a good race to put in a fresh engine if you have one available, as you really need the best straight line speed you can get against the AI here. This is not a race to use a 60% worn engine at. You can use an older engine for the practice sessions, but I always change to a brand new or fresh engine after the sole practice session, before Qualifying starts.
ERS (Qualifying)
Your ERS Overtake allowance drains faster than some other tracks on ’25, but you’ve still got a decent allowance to use along all the main straights. But if you over-use it in sectors 1 and 2, you can get the “Deployment Used” sign come up as soon as you enter sector 3, which can hurt your straight line speed in that sector. For more even Overtake deployment across a flying lap, maybe hold back a bit the first 2 sectors so your ERS meter is still at about 30% coming into the final sector so you can get a good blast of battery there as well.
Defending
ERS does drain fast here, but unlike the last game it doesn’t recharge fast, so you need to be a lot more sparing with the battery. Basically, it’s advised to save any battery you use for the Kemmel straight after Eau Rouge for defending, as it’s the long DRS zone, and then let it recharge the rest of the lap. You may also need a burst on the full throttle section you finish the lap with, but you’ll find your ERS quickly.
Driving In The Wet
Wet weather is common here and plagued my first race weekend here. Here’s a summary of some tips for driving in the wet:
- If you’re finding the AI massively over-powered and impossible to compete against when using the same AI level you use in the dry, you’re not alone. Consider dropping in 10-15 clicks for wet sessions to balance it up.
- For actual driving in the wet, traction out of slow corners is super tricky. It’s about patience on your throttle and steering inputs:
-
- Be super patient getting on the power out of slow corners, not going full throttle until at least 5th gear and sometimes 6th gear and being progressive and gradual on the input.
- Don’t use the full range of the steering input on your joystick; try to use only one half to two thirds of the steering range to add more nuance to the steering.
- My suggested setup tweaks also help to dial out some rotation from the setup to make it easier to get back on the throttle out of slow corners.
-
- Turning the ERS down to None in sector 2 can also make traction easier here in full wet conditions especially, as well as helping you recharge for use on the straights. It will vary between players though, so I’d recommend testing using only Medium and Overtake vs turning down to None sometimes, to see which delivers you better stability and/or lap times.
- The two trickiest corners in the wet seem to be the last chicane, where the back end really wants to step out on exit, and turn 1 as well. Both corners need even more patience on the traction on exit and the car keeps “fish-tailing” if you over-apply the throttle.
- For mixed weekends where it’s both dry and wet sessions, it’s generally better to prioritize for the wet session rather than the dry if one or both races is going to be wet for a long time. Having an unsuitable setup for full wet conditions really seems to kill any chance of competing against the AI, and you might just get left for dust.