
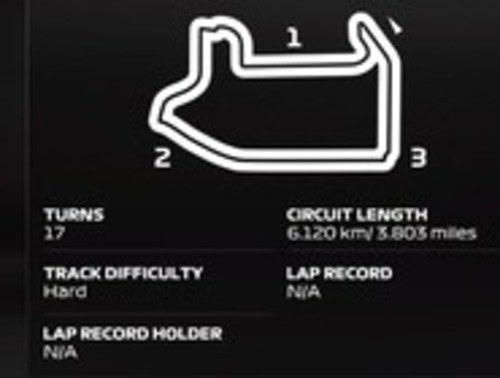
The Las Vegas track that debuted on F1 23 has had a mixed reception to say the least among fans. The layout has been likened to an “upside down pig” in terms of it’s shape, with some fans and players being scathing about it.
I’ll be honest, I was skeptical at first, but I actually don’t mind it at all and have had some fun races on it. With that massive long straight along the strip and most of the rest of the lap being full throttle as well, there’s really only one direction to go with the setup for F1 25 – minimum downforce or close to it. As much as I’d like to pull out my new trick of using higher wings like I did at CoTA, it won’t work on this track.
Here’s a general dry race setup for Brazil for a controller user:
- Wings – 0/3 or 5/8
- Diff – 10/55
- Camber/Toe – -3.50/-2.00/0.03/0.13 (LL/3/13)
- Suspension – 41-3-14-10-22-49
- Brakes – 100% Pressure/55% Bias
- Tyres – Fronts 28.0; Rears 25.0
The low wings is a must, but I’ll cover some other aspects of the setup that can be tweaked for the usual stability vs pace trade-off.
Hotlap With My Setup
More Setup Info & Tweaks
You can go different routes with the setup at Las Vegas, so here’s some extra info on creating your own setup for your own liking.
Wing Levels – Wings have to be at minimum or close to it. 0/3 is a good baseline that also provides decent stability, but you can try going a bit higher to something like 5/8, since the twisty bits are where the extra lap time can be found. It’s all about that ridiculous long strip straight; set your wings too high and you’ll have multiple (not just one) cars blasting past you. The DRS zone on that straight has been shortened quite a bit this year, but being able to defend here is essential.
Update – I’m actually preferring the 5/8 configuration right now as I like having that extra bit of grip on worn tyres, but in my practice runs both the race strategy and qualifying runs delivered almost identical lap times using either 0/3 or 5/8, so I think it’s just down to personal preference.
Traction & Grip – The low wings is a must, but it’s also a low grip track and the back end will be wanting to step out constantly which can be risky with the walls close by. The left-right-left chicane towards the end of the lap can get especially tricky and needs careful throttle input as the tyres wear. Therefore I’ve tried to add some stability through the setup via the wing spacing, Off Throttle Diff, toe and roll bar settings to keep the car a bit more planted to the track. If you want something that’s potentially faster but more unstable, lower your Off Diff, move all the geometry values to LLLL, and flip round the roll bars to something like 12/16 or 12/21.
Tyre Pressures – Tyre temps are not such an issue round here with the long straights giving them plenty of time to cool down, but I’d still put the front and rear pressures something like three quarters of the way to maximum for ideal temperatures during a race. If you’re still having problems with the fronts or rears getting into that 100 C+ danger zone, raise them to maximum, but mostly you should be fine here.
Intermediate Conditions – You’re not likely to get wet conditions here in career mode, but if someone sticks it on for fun in a lobby, I’d stick largely to your dry setup if it’s just intermediate conditions. Maybe add 1-2 clicks of wing, but space them 4 clicks apart for more stability (so something like 2/6 or 3/7). Also move you Throttle Diff down to minimum if it’s not already there, and bump up your Off Throttle Diff up to 60 to dampen the rotation for more stability.
Full Wet Conditions – For heavy rain sessions here, it’s even trickier. I’d add a bunch more wing, and make the spacing 5 clicks for stability. So something like 10/15 to 15/20 wings, plus 60 or 65 Off Throttle Diff to dampen rotation. Also raise the ride height 3-5 clicks, and then it’s a case of being a lot of more measured on your throttle and steering inputs to prevent over-rotation and poor traction. Turning ERS down to None in the corners can also help.
Also, AI still currently bugged in the wet, being much faster than in the dry at each level to the point where it’s not fun to play against for some (patch 1.04 still hasn’t fixed this). Maybe drop the AI level 10-15 clicks before any wet sessions to make it easier. I’m currently dropping 15 clicks.
Racing & Strategy Tips
I’ve got to say that despite the bed rep this track got at first, I’ve always found the racing here fun, and I certainly prefer it to the Miami track. Here’s some extra tips for racing here.
Fresh Engine – This is a good race to put in fresh or newer engine parts if you have one with the massive straight. You probably don’t want to be defending against the over-powered AI down the strip with 60% worn engines.
Tyre Wear and Strategy – Wear is less problematic here, here are the rates I found:
- Soft – 6.5 – 7% per lap
- Medium – 4% per lap
- Hard – 3.5% per lap
- Rear limited track, with the right rear wearing the most, but wear is pretty even across all 4 tyres.
For 25% races, the soft can hold up for a few laps so you can choose any tyre combo you want. For 50% races, a 1 stop should still be pretty easy with the lower wear and degradation, but medium-hard is usually recommended.
Turns 1/2/3/4 – This is a tricky little section to open the lap, with a left hairpin followed by the prolonged right hander. I found I got the best lap times by taking an early entry into turn 1, and a wider line through turn 2 for a slingshot onto the straight. Be patient on the throttle in the long right hander if on Med/No TC, upshift through the gears for better traction, and wait until the car is almost pointing straight until going full throttle.
ERS (Races) & Defending – Holding off the AI here is tricky, even using low or minimum wings and especially once the tyres start getting 5-10 laps old. When trying to defend position, only use ERS Overtake mode strictly when needed to prevent a car overtaking and not elsewhere on the lap (mostly, this is a short burst exiting turn 4 and onto the long strip straight, where getting a good exit is key to punching away from the AI). Otherwise, don’t use it and let it recoup the rest of the lap. Sometimes, it’s better to give up position on the long straight and recharge for a lap or two before taking the position back.
Slow In, Fast Out – At this track, I find the best lap times come when I take a slow in, fast out approach to some of the cornering sections, especially the left-right-left sections of turns 7-9 and turns 14-16. Also for the left hander leading onto the massive strip straight. Some of the entry points are kind of unsighted, and carrying too much speed into these sections can really cost you loads of lap time, so I tend to always brake earlier rather than later and focus on getting good traction and smooth exit out of the more technical sections rather than trying to brake later and later and “force” lap times. Braking earlier is also advised simply because brake temps tend to stay chronically low at this track because of all the long straights (they’re often blue on your MFD round here as they struggle to get up to temperature).