
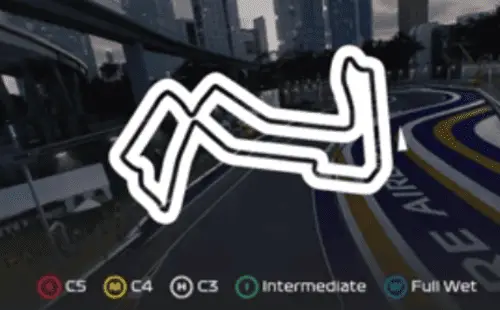
The Marina Bay Circuit in Singapore returns for F1 25 with the new reprofiled and more flowing layout that’s been in place since 2023, with the fiddly stadium section in sector 3 removed and now just a single DRS straight.
This new layout means that for a race setup, it’s not about banging on max downforce as it might have been in some previous games. You need to leave some wing off for straight line speed as there’s now 2 pretty long straights and no less than 4 DRS zones in total. Therefore you’re looking at a high (but not max) level of downforce here on this game.
Here’s a general dry race setup for Singapore for a controller user:
- Wings – 42/44 or 44/46
- Diff – 10/55
- Camber/Toe – -3.50/-2.00/0.03/0.13
- Suspension – 41-3-14-10-23-50
- Brakes – 100% Pressure/53% Bias
- Tyre Pressures – Middle pressure front tyres; Max pressures rears
(update – this setup was fine but I started getting this weird skidding on worn tyres where the car would lose grip in some of the corners. So I actually found that loading up the Maximum Downforce in game template setup, and then just porting my wing, diff, brake and tyre pressure settings over from above (but leaving the suspension/geometry settings as you find them with the preset), gave better stability over a stint).
Hotlap With My Setup
More Setup Analysis & Tips
Here’s some extra analysis and possible tweaks for making your own preferred setup.
Wing levels – This is a tough one for me. I’ve listed 36/38 was the wing levels, and it is what I ended up using. But I got a better and more consistent feeling using 40/42 wings. But I think this will be too high for a race and you’ll be vulnerable in the DRS zones. But experiment for yourself and try any wing levels from 36 to 42. For online races, I’d definitely go higher. But offline against the AI, you need a bit more straight line speed to defend against their weird straight line speed coding.
(update – I should have used higher wings like 42 to 46 and next time I definitely will do – my CoTA setup guide and template guide cover this issue in more detail. Basically, higher wings are much better overall at some tracks despite any loss in straight line speed).
Tyre Pressures – In previous games it’s been max pressures all tyres round here, but this year on ’25 the fronts don’t overheat so bad, so you can keep pressures around middle or just above. Still need to bump the rears the maximum though to keep the temperatures down, and even using max pressures, watch out for the right rear as it can still sometimes overheat if you go too hard on traction out of slow corners.
More Aggressive Setup – This setup is stability focused and geared towards the race. If you want something more aggressive for better single lap pace, you can: a) bring the wings closer together and even set the front above the rear, b) Flip the roll bar settings around and use something like 12/19 or 12/21, or c) Lower the Off Throttle Diff to 40 or 35 for sharper rotation. And for the a and b changes, you can also just do them for qualifying and revert back for the race. But if you keep these changes for the race, they’ll make the car harder to control on worn tyres.
Intermediate Conditions – I had a wet session here and adding a bit more wing and spacing them apart more helped. Try something like 44/48 or 46/50 wings, and raise the Off Throttle Diff to 60 to dampen rotation. In lower level intermediate conditions, the inter tyres can sometimes overheat no matter what you do while the AI seem fine, which is a bug in the game that needs fixing. But try to be super careful and patient on traction anyway, as going too hard on corner exits (as well as deploying Overtake too soon on exit) can worsen overheating rears.
Full Wet Races – Heavy rain conditions is not going to be fun round here. I’d max the wings out but put them 5 clicks apart, so 45/50 wings, plus 60 or 65 Off Throttle Diff. Also raise the ride height 3-5 clicks and possible add some rear toe for more stability. Then focus on being super careful with throttle and steering inputs (especially being patient on the power on corner exits) and turning ERS down to None in corners if you want to make traction easier.
Update – AI is also bugged on this game in the wet, being way too hard for many players, so you might need to drop the AI level 10-15 clicks for any wet sessions. I’m currently dropping it 15 clicks.
Driving & Strategy Tips For Singapore
Here’s some extra tips for driving round this now much more flowing track
ERS (Qualifying) – Got loads of Overtake ERS mode to use here – basically as much as you want on any of the straights. Just keep an eye on the yellow ERS meter and aim to drain it to around 10% or just under just as you cross the finish line.
Patient on Traction – I’ve tried to add a bit more stability to my setup to prevent over-rotation, but regardless of the setup you use, it’s important to be patient on the throttle out of corners, especially once you’re 3-5 laps into stints and even on the medium and hard tyres. You’ll start noticing more wheelspin moments out of corners around this point, but trying to compensate by being even more aggressive on the power just overheats the tyres more and you can get stuck in a loop where even the harder tyres are overheating at the rear and you’ve still got loads of laps to do in a stint.
Tyre Wear and Strategy – Here are the wear rates I found:
- Soft – 8.5% per lap
- Medium – 4% per lap
- Hard – 3.75% per lap
- Rear right is the tyre that wears the quickest, and also easily overheats if you’re too aggressive on the throttle out of slow corners.
You could technically use the soft tyre for a 3-4 lap stint in a 25% race, but having tried this myself I don’t recommend it as the traction falls off so fast that your second stint even in a 25% race is longer, meaning your traction starts getting tricky on that tyre as well. I’d recommend medium or hard tyres for all race lengths, and avoid the soft tyre. 50% races are probably a 2 stop (MHH) unless you’re amazing at managing tyres – I’d try to squeeze 5-7 laps out of the medium tyres and then just use the hards in two stints from there.
Undercut – Track position is crucial here as overtaking is so difficult, so one strategy trick here is to come in 1-2 laps early and try and jump a bunch of cars in front. The undercut is powerful as tyre deg is quite high, so the pace benefit of fresh tyres is very noticeable and you can jump several places at the pit stop if you come in early.
Defending/Attacking (races) – Although there are 4 DRS zone on this track, the only one where the AI can really overtake is the long straight coming out of turn 5. The other 3 DRS zones, they can get close but not overtake unless you make a big mistake. Therefore, if you’re defending, I’d save all your ERS for this one straight and don’t use it the rest of the lap to let it recharge (since ERS is hard to recover on this game).