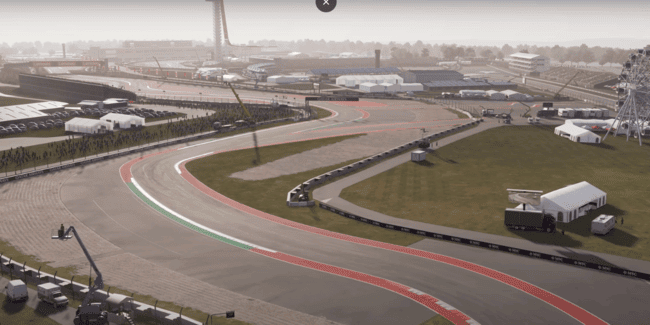
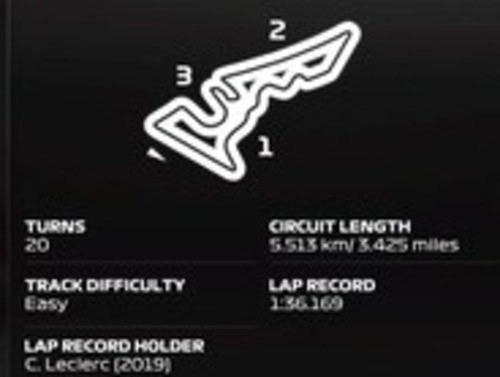
The Circuit of the Americas (CoTA) track in Austin, Texas is now well established having been on the F1 calendar since 2012. With a mixture of different sections of track, it’s a technical challenge requiring some real accuracy and precision to nail a really good lap.
What downforce level to use is a real conundrum on F1 25, as you need lower downforce setups to remain competitive against the AI on the long straight, but you also need higher downforce setups to maintain good car stability when the tyres are worn. How do you resolve this catch 22?
I’m still figuring out the answer, but ultimately in my first career race here, I’ve actually decided to deviate from my normal setup strategy so far and go for a higher downforce setup with higher wing angles to test it out.
Here’s a general dry race setup for Texas for a pad user:
- Wings – 40/42
- Diff – 10/55
- Camber/Toe – -3.50/-2.00/0.00/0.15 (LLL/0.15)
- Suspension – 41-3-14-10-22-49
- Brakes – 100% Pressure/55% Bias
- Tyres – Maximum pressures all tyres
I’d normally have set wings somewhat lower than this in the mid to high 30s, but on rear limited circuits with lots of traction zones I’m finding real trouble controlling the car once the tyres are a few laps worn and traction issues are kicking in.
note – Texas is a sprint race format weekend in career mode, meaning different considerations come into play (more on this in the section at the bottom).
Hotlap With High Downforce Setup
Additional Setup Info & Tips
Here’s some more tips and considerations for creating your own setup.
Wing levels (low vs high downforce)
I’d normally have used something like 34/36 wings round here, but for this race I’m experimenting with using higher wings as covered in the embedded video below, to see if it makes the tyre wear easier to handling in the second half of stints. So I went with 40/42 wings, and I’m really preferring it so far from the Sprint Race (and in the main race it was even more effective).
The higher wings kept me closer to leading cars in sector 1, and meant I stayed in the DRS zone of other cars rather than falling out as I often having been doing using higher wings. Using higher wings also means you’re less affected by dirty air, meaning you can follow closer and make DRS passes more easily despite having higher wings. I was also able to defend on the straights fine with strategic ERS usage (see further below), and the car was easier to control once the tyres started wearing. So overall, the benefits of using higher wings in the 40s seem to be outweighing the drawbacks here.
IMP Video – You need higher downforce for races when the tyres go off
My verdict – It’s a slam dunk, yes, using higher wing levels at some tracks seems to be more beneficial despite the loss in straight line speed, because you gain more in terms of downforce in twisty sections, easier car handling and therefore better average lap times over longer stints, plus less affected by dirty air and better able to follow other cars.
I’ll be revising some of my other setups especially at rear limited or traction heavy circuits like China, Bahrain, Miami, Hungary, Baku, Singapore and others and applying these principles – higher wings is better overall. But 40/42 wings worked superb here at CoTA
Tyre Temps/Pressures
Because of all the traction zones and successive corners here, the tyres are put under a lot of stress and do overheat quickly. It’s more exaggerated than the last game, so this track is one specific one you need to watch out for overheating. Therefore it’s max pressures all 4 tyres to keep the temps down, and even then the rears will still usually overheat if you use the softs for even a few laps. Being cautious and patient on traction and minimizing those “wheelspin” moments can help slow down overheating.
More Aggressive Setup
If you want a setup that’s more aggressive with more potential single lap pace on fresh tyres, you can bring the wings closer together or set the front above the rear for stronger turn in. You can also reduce the Off Throttle Diff to 40, 35 or even lower, as well as banging all camber/toe values all the the left. But will make traction a lot harder on worn tyres.
I’ve also set the roll bars to 14/10, which gives a nice planted but slightly sluggish feel to the handling, but makes traction a lot easier on worn tyres. If you flip the ARB settings round to something like 12/16 or 12/21, you’ll get a looser handling and potentially more performance, but traction might be harder as stints go on.
Intermediate Conditions
For light rain conditions, it’s all about making the traction easier. I’d keep similar wings to the dry setup (or add a few clicks), but space them 4 clicks apart (so something like 42/46) to dampen rotation. I’d also raise the Off Throttle Diff to 60. Then it’s a case of being even more patient and progressive on the throttle out of corners than in the dry.
Full Wet Races
I’ll be honest, I don’t find full wet conditions fun on this game, especially circuits like this with lots of traction zones. I’d max the wings out but with 5 click spacing and the rear wing higher (so 45/50), and raise Off Throttle Diff to 60 or even 65 to reduce rotation. Also raise the ride height 3-5 clicks and also consider softening the roll bars to 14/10. Then it’s a case of being even more cautious on the throttle and steering inputs, plus turning the ERS down to None for any major traction zones to make the exits easier.
The AI difficulty also seems to be bugged on this game, with the AI being massively too hard for many players on a difficulty they find fine in dry conditions. Therefore consider dropping the AI level 10-15 clicks for any wet sessions (I’m currently dropping 15 clicks). Patch 1.04 does not appear to have fixed this.
Tips For Racing At CoTA
The Austin race is a strange one on this game, with a lot of different factors such as tyre temps and the Sprint format combining together to make it quite challenging. Here’s some extra tips for navigating this weekend.
Sprint Format Weekend
Austin is the fourth of six Sprint race format weekends on this year’s official calendar (closely followed by Brazil and Qatar). Therefore you’ve only got one practice session to get the practice programmes done and a setup dialled in before everything is locked into “parc ferme” (you CAN change setups briefly just before you drive out in main Qualifying, but then they’re locked again for the rest of the weekend.
Therefore be sure to change any engine parts straight away after P1, and also choose the Harder Tyre Allocation before the weekend starts if you want to free up more soft tyres to use for the single practice session. The Medium allocation, which I prefer, frees up 1 set of hards and 1 set of softs.
Because “parc ferme” is also briefly unlocked again before you go out for main Qualifying (4th session), you can experiment with different setup directions, perhaps trying higher wings for the sprint and lower wing for the main race (or vice versa), making adjustments if you feel the downforce you used for the Sprint race wasn’t quite right.
Sprint & Race Qualifying
Depending on the tyre allocation you choose, you might only be left with one set of soft tyres to use for this session. If so, wait until the last 5 minutes before going out, as this is when the track is “rubbered in” and at it’s fastest. Same for main Quali if you’ve only got 1 or 2 fresh softs to use. Track evolution has been a real thing on recent F1 games, and times do get faster at the end of Qualifying sessions.
ERS (Qualifying)
You’ve got a decent allocation of Overtake mode to use here on qualifying laps – enough for all along the two main straights and little bit elsewhere as well where you can., such as coming down the hill out of T1 and heading into T11. It is possible to exhaust your deployment; keep an eye on the yellow ERS meter on flying laps and look to drain it down to around 10% just as you cross the finish line, and down to around 20-25% as you reach the end of the long back straight.
Tyre Wear and Strategy
Here are the wear rates I found from my own testing:
- Soft – 7% per lap
- Medium – 4% per lap.
- Hard – 3% per lap
- Rear left wears and overheats the quickest, rear right not far behind.
The red soft tyre is not really usable in races here; even with maximum pressures, the rears overheat after just 1-2 laps. Therefore it’s a medium-hard or hard-medium strategy for longer races, and probably a 2 stop for 50% races. It’s recommended to save all your softs for qualifying and don’t bother using them in races. For a 25% race, you could use the softs just for 1-2 laps and then go straight onto the hards, but this may not be optimal as it lengthens your stint on the hards to the point where even they may be tricky to control depending on setup and driving style.
50% race update – for online (equal cars) 50% races, or in career car with 2 or more tyre wear updates completed, you can make a MH one stop work round here, pitting laps 8-10. Just make sure wear on the medium is kept at 6% or lower, and wear on the hards at 4% or lower on the worst wearing tyre (left rear).
Traction
Lap time here on a pad seems to be about getting smooth traction out of corners, without the back end stepping out. I’ve tried to create a setup with easier to apply traction throughout a race.
Additionally, try to be smooth, progressive and patient on the throttle as getting too greedy on the accelerator seems to exacerbate the overheating issues and make the traction harder, and it can become a kind of vicious cycle. The turn 11 hairpin onto the back straight and the final corner are two corners where “snatching” on the throttle too early can aggravate the rear tyre wear and temps.
Defending
If you’re going to go the higher wings route like I did, defending might be hard but you’ve got a few things in your favour. Firstly, it’s really only the massive long back straight you need to watch out for (save all your ERS for here), and the DRS line starts later here this year so you’ve got more chance to defend.
Second, if you get the hang of really accurately threading the car through sector 1/esses and get good at nailing it using higher wings, you can be 3-5 tenths faster than if you were using a lower wing setup, meaning you should be far enough ahead of comparably paced cars that they can’t overtake on the main back straight. For massively faster cars, you might just have to give up and let them go past. But for similarly paced cars, using the extra downforce can get you far enough ahead in sector 1 that you can defend on the long straight.
If it’s clear you’re in defence mode and are just trying to hold position against chasing cars, it’s a pretty a simple strategy. Just use your Overtake in the two main DRS zones – a very short burst on the pit straight if needed (sometimes might not be if you get a good exit and are half a second or more ahead already) and a longer burst on the main back straight – and don’t use it the rest of the lap to let it recharge.
Get good exits out the last corner and the turn 11 hairpin and use your ERS strategically and you can defend if you keep nailing strong sector 1 times. Also try to make sure you’ve got at least 40% battery heading onto the main straight on the last lap, as that’s when the AI really deploy everything they’ve got left and try a move.